In this post I will show you how to use JS Link to implement delete-buttons in a list view.
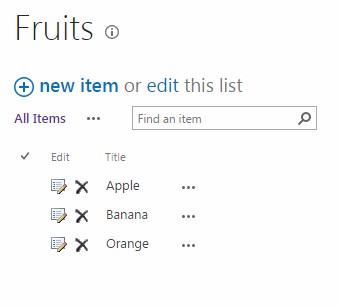
I will use the built-in “Edit” field as a base for this customisation. The “Edit” column normally shows a button for opening the list item in edit mode. I will override the rendering of the “Edit” button and add another button for deleting the selected list item, as shown in the following screenshot.
The first thing we need is a javascript file with some code for overriding the default rendering of the “Edit” field in list view mode. The following code will do this:
(function () {
function view(ctx, field) {
// Get the markup that is by default rendered for the "Edit" field.
var editButtonHtml = (new ComputedFieldRenderer(field.Name)).RenderField(
ctx, field, ctx.CurrentItem, ctx.ListSchema);
if (editButtonHtml.replace(/ /gi,'')) {
// If the edit button is displayed, it means that the user has edit permissions.
// Then display a delete button also.
var deleteButtonHtml =
"<a href='#' title='Delete'><img src='/_layouts/15/images/delitem.gif' " +
"onclick='javascript:window.deleteItem(\"" + ctx.ListTitle + "\",this);'/></a>";
return editButtonHtml + " " + deleteButtonHtml;
}
return editButtonHtml;
}
var overrideCtx = {};
overrideCtx.Templates = {};
overrideCtx.Templates.Fields = {
'Edit': {
'View': view
}
};
SPClientTemplates.TemplateManager.RegisterTemplateOverrides(overrideCtx);
})();
When clicking on the delete button, we make a call to a function called window.deleteItem, which will contain the logic for deleting the given list item. We will implement this logic by making a REST call to delete a list item by id. The id is extracted from the table row of the clicked button.
window.deleteItem = function (listName, element) {
    if (DeleteItemConfirmation()) {
        // Extract the id of the clicked list item.
        var id = $(element).closest("tr[iid]").attr("iid").split(',')[1];
        $.ajax({
            url: window._spPageContextInfo.webServerRelativeUrl +
                "/_api/web/lists/getbytitle('" + listName + "')/items(" + id + ")",
            type: "POST",
            headers: {
                "ACCEPT":"application/json;odata=verbose",
                "content-type":"application/json;odata=verbose",
                "X-RequestDigest": $("#__REQUESTDIGEST").val(),
                "IF-MATCH":"*",
                "X-HTTP-Method":"DELETE"
            }
            success: function(data) {
                $(element).closest("tr[iid]").remove();
            }
            error: function(error) {
                console.log(JSON.stringify(error));
            }
        });
    }
}
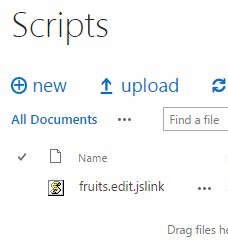
That’s all the code that we need to deploy for this example. Now the next step is to configure the SharePoint list so that it uses our javascript code when displaying the list items. We do this by first putting the all javascript code in a file called fruits.edit.jslink.js and then uploading that file to a document library on the site. In this example we will upload the file to a document library called Scripts.
As a next step we need to configure the JS Link property on the list, so that it points to the javascript file we just uploaded. This can be done e.g. by using PowerShell or the client API. In this example I will use the C# client API.
var jslink = "clienttemplates.js|~site/Scripts/fruits.edit.jslink.js";
var context = new ClientContext(siteUrl);
var list = context.Web.Lists.GetByTitle("Fruits");
var field = list.Fields.GetByInternalNameOrTitle("Edit");
context.Load(field);
context.ExecuteQuery();
if (field.JSLink != jslink) {
    field.JSLink = jslink;
    field.UpdateAndPushChanges(true);
    context.ExecuteQuery();
}
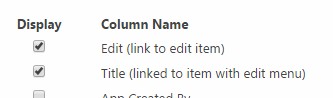
After the JS Link property is configured on the list, we can add the “Edit” column to the list view and it will then display the additional delete buttons for each list item.
An advantage with this solution is that the code that we deployed in the JS Link file does not contain any reference to a specific list. It means that the same code can be used on any list on the site. We can even configure the same JS Link file on the “Edit” site column, which would apply this logic to all lists on the site.